In this short article, I will try to explain simply and straightforwardly how to create an event on Facebook.
Such events can be used for bachelor parties, children’s christenings, and celebrations. In addition, you can create private and public events, so it’s an excellent tool for inviting people to various events.
So, let’s start from the beginning. Below I will explain how to create an event on Facebook.
Creating an event on Facebook on desktop
Creating an event on Facebook is not difficult. If I could do it, you can too. Let’s start.
Step 1. Press on the Arrow button to See more.
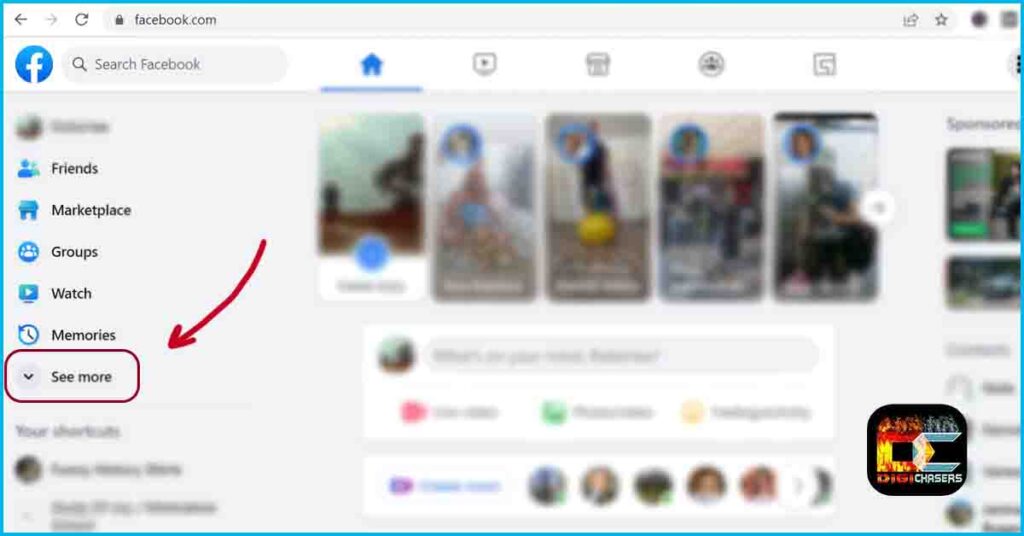
- On the left side of the screen, click on See more.
Step 2. Press on Events.
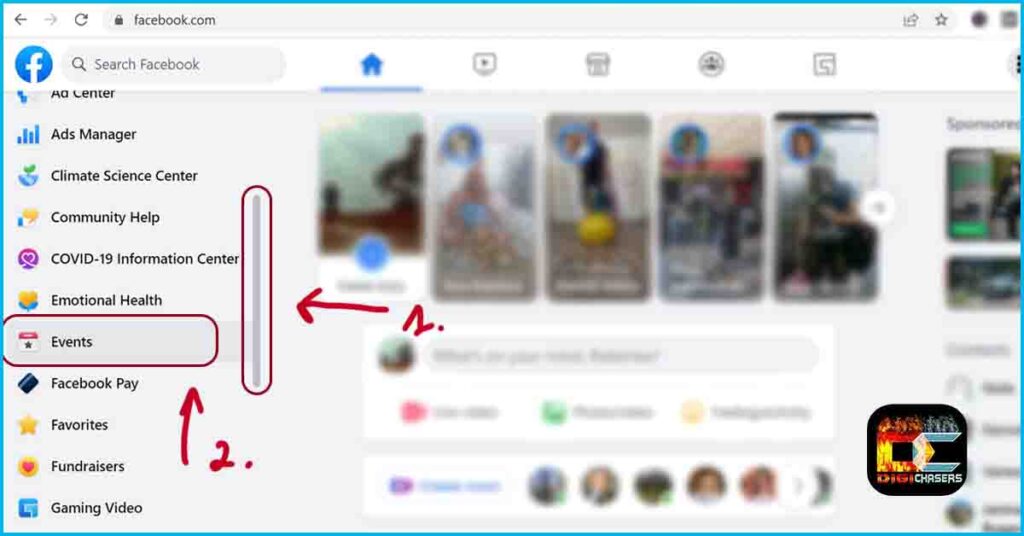
- Point the cursor to the left side and scroll down until you see the option – Events.
- Press on Events.
Step 3. Create new event.
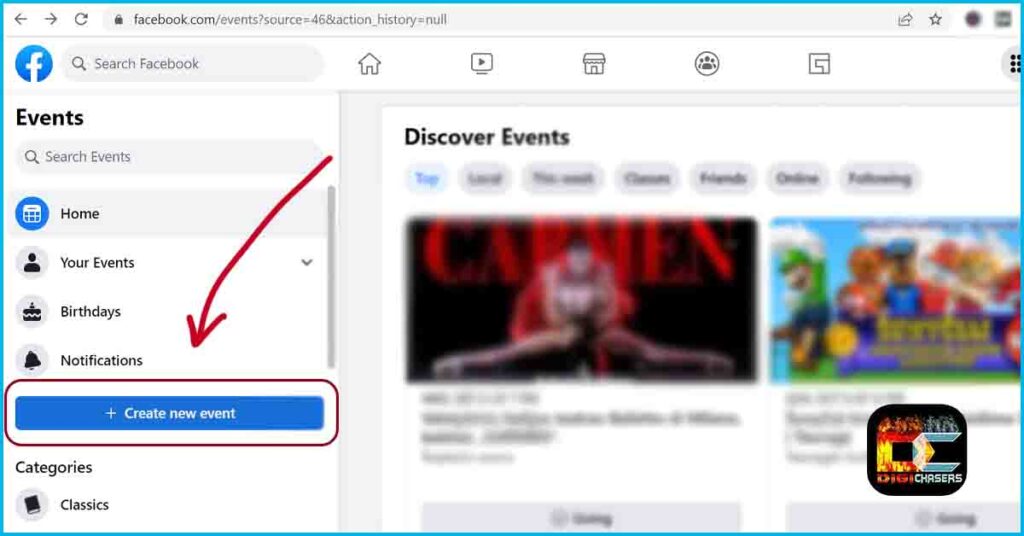
- Press on Create new event.
Step 4. Event.
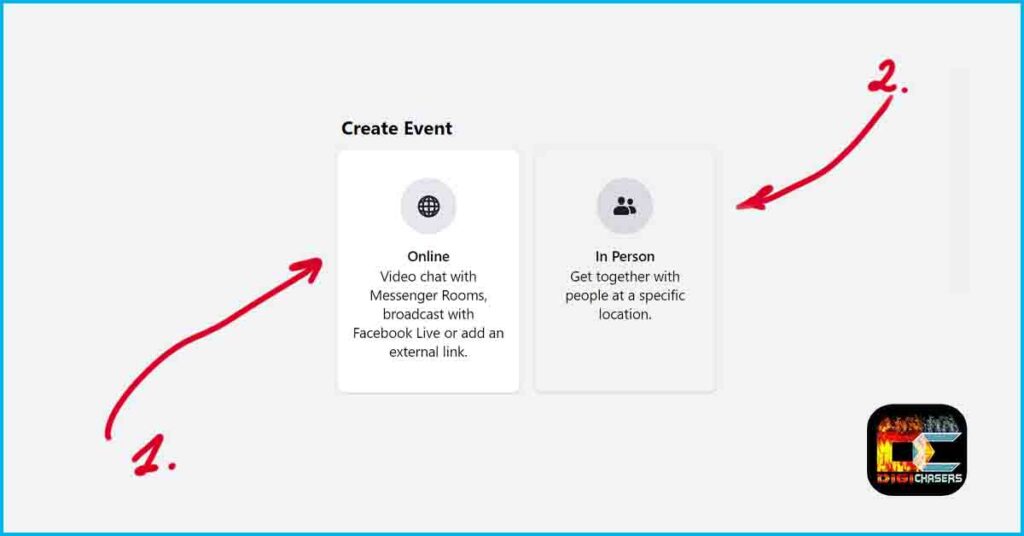
- Facebook Online Event: These are the kind of Events that are shown live. This option is used mainly by Media companies, News Organizations, Fitness instructors, Theater groups, Content creators etc.
- Facebook In Person Event: It can be a simple personal celebration or a grand concert, during which people gather in a particular place.
Next, I will continue with the Creating an In Person event tutorial. If you need a tutorial on creating online events, please comment in the comments section or write me an email.
Step 5. Event details.
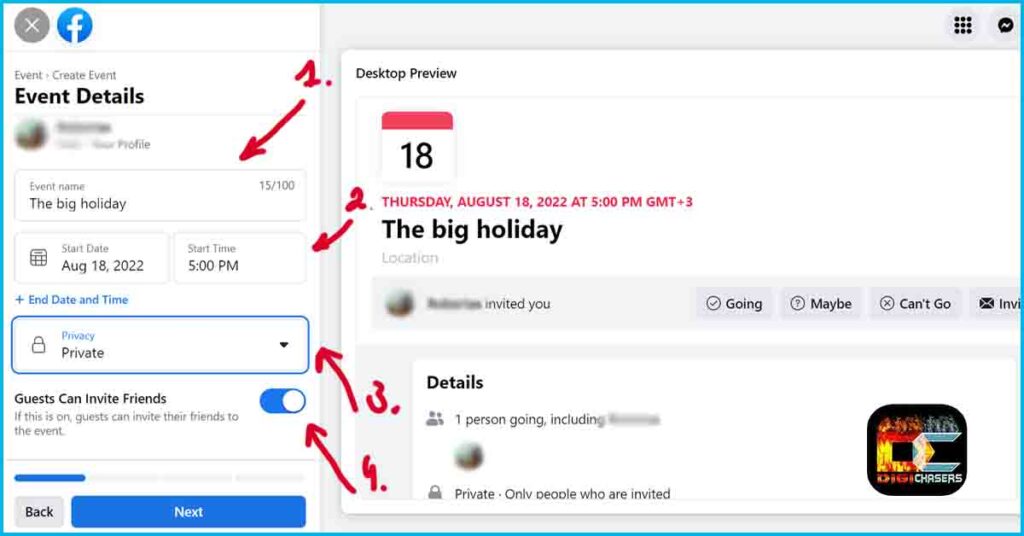
- Event name: Choose a name that reflects the event. This name will be the first thing people invited to the event will see.
- Start Date and Start time: Here, you can specify the event’s start time. If you want to add an end time, you can see the plus sign and text below “End Date and Time” and press on it.
- Privacy: Choose who can see and participate in the event. There are four main options: Private, Public, Friends, and Group.
- Guests Can Invite Friends: If you choose Private privacy, you will need to choose whether guests can invite their friends to the event.
- Once you have selected the visible configurations, click Next.
Step 6. Create event.
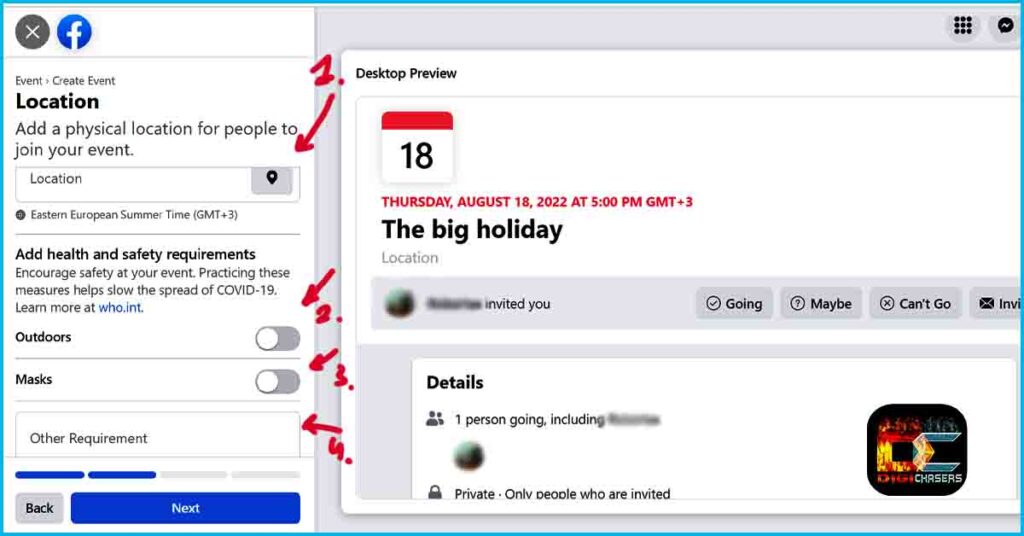
- Location: Choose the place where the event will take place.
- Outdoors: If the event will take place outdoors, check this box.
- Masks: Note whether masks will be required.
- Other Requirement: If you have other requests for participants, please check this box. You can specify more than one requirement here.
- When you have filled in these fields, click Next.
Step 7. Description.
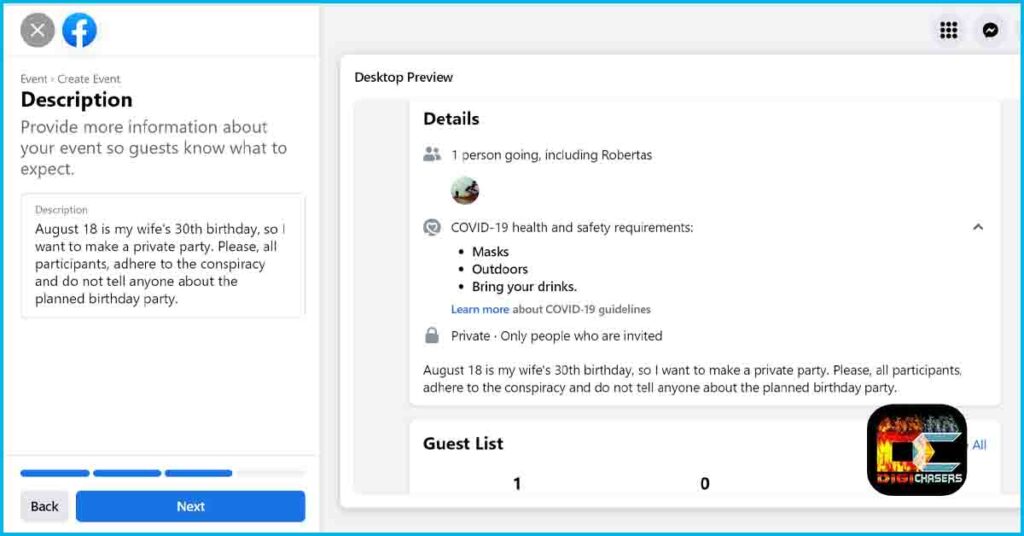
- Description: Write a clear description so that everyone understands what the event will be about. After that, press Next.
Step 8. Cover Photo.
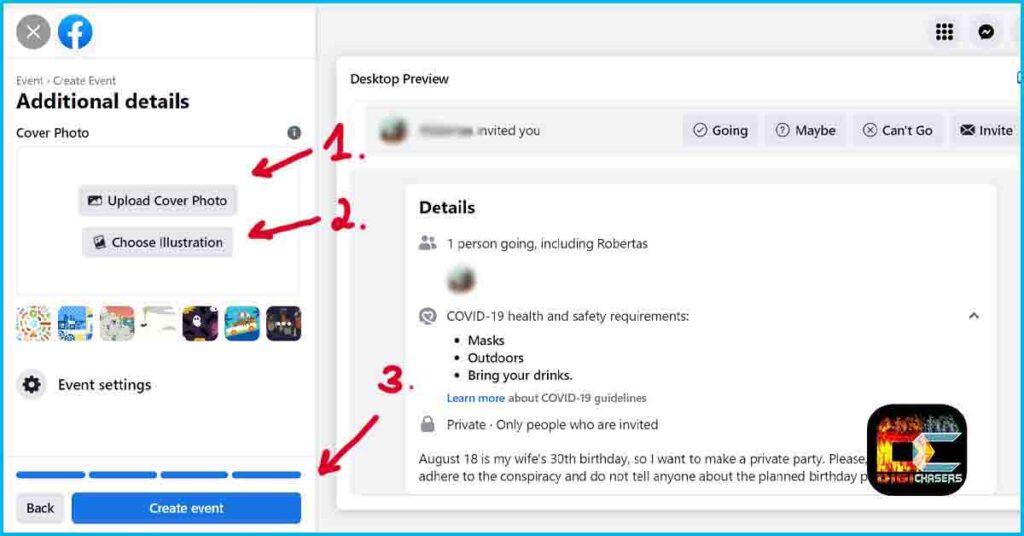
- Upload Cover Photo: Click this button to upload your photo.
- Choose Illustration: Here you will find countless illustrations on various topics. I like this option, but if the event is very mature, I think you should upload your photo.
- Create event: The final step in creation has taken place. Clicking the Create event button will create an event. After that, you will need to invite your friends to participate in the event.
Step 9. Invite friends.
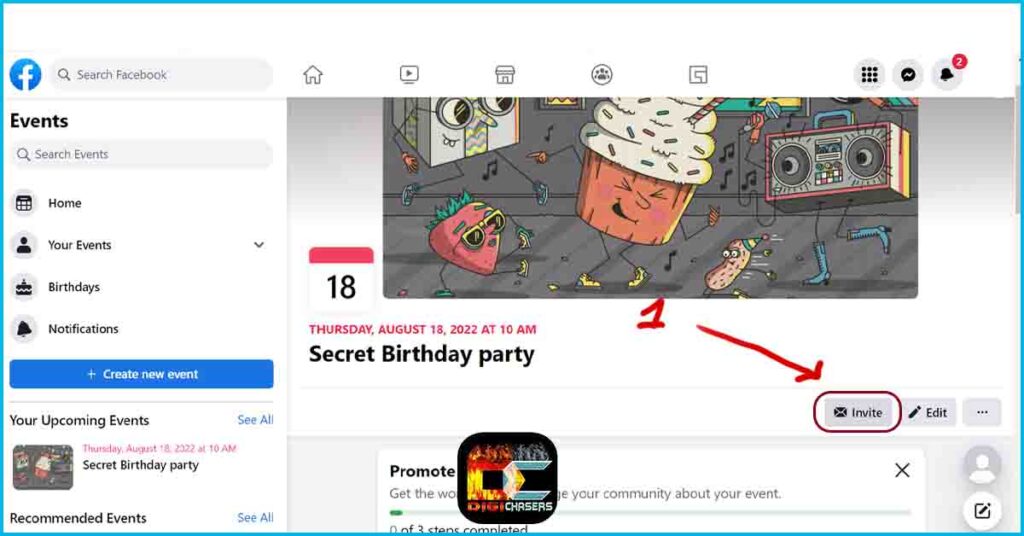
- Press the Invite button to invite friends to your Event.
This is how you create and Event on Facebook on a desktop PC. I hope I have presented all the information on creating an event clearly and comprehensibly.
Creating an event on Facebook on mobile
Sometimes we don’t have access to a computer or don’t have time, so you can quickly and conveniently create a Facebook event using your mobile phone.
Step 1. 3 horizontal lines.
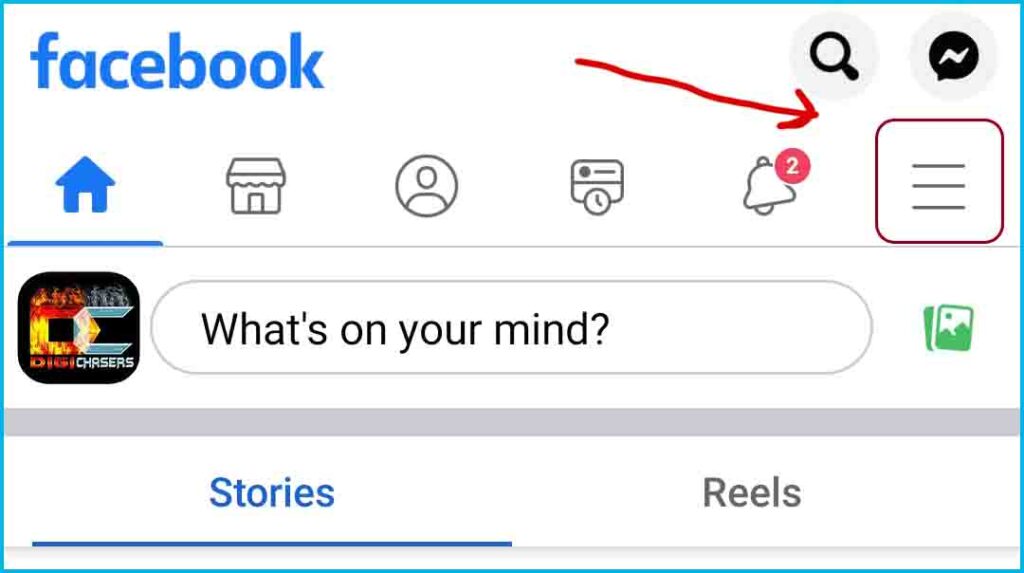
- Click on the three horizontal lines.
Step 2. Menu.
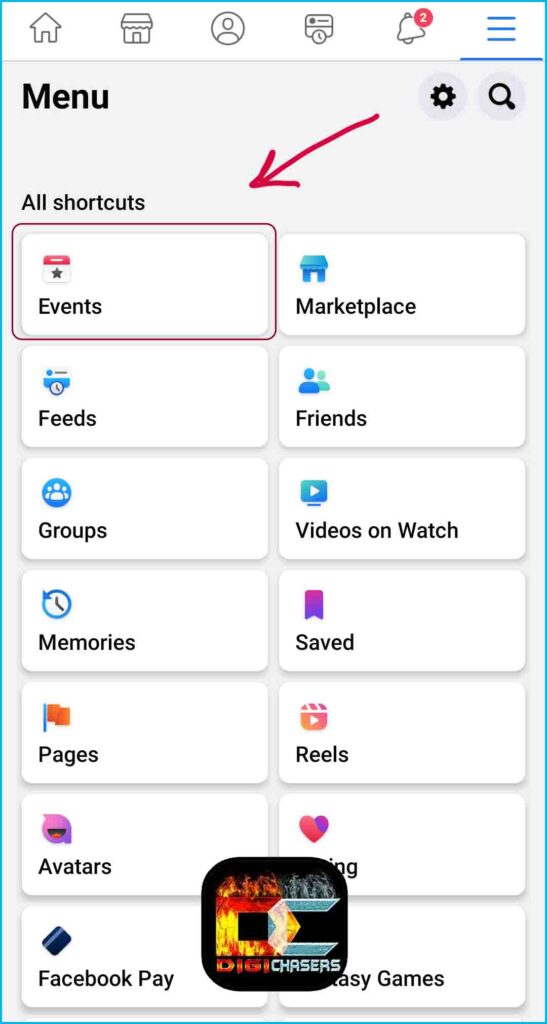
- Select Events. If you don’t see this option, scroll down and click See more.
Step 3. Press on the Plus button.
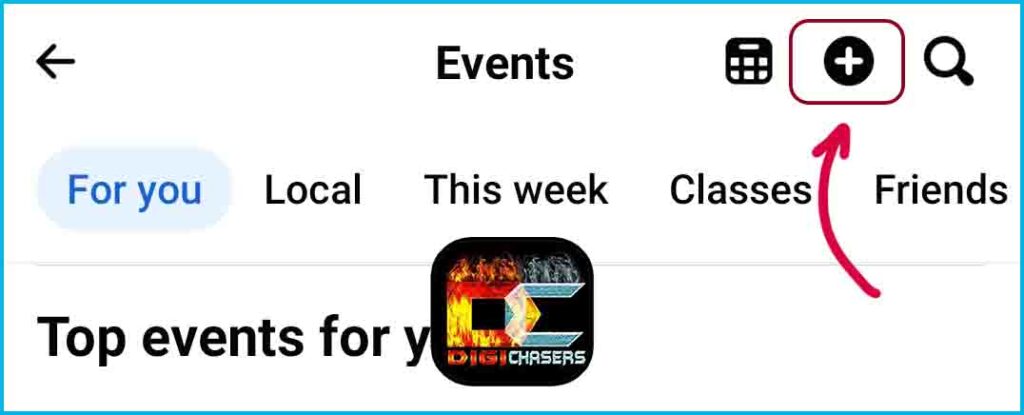
- Press the plus button. After which, you will start creating the event.
Step 4. Create event.
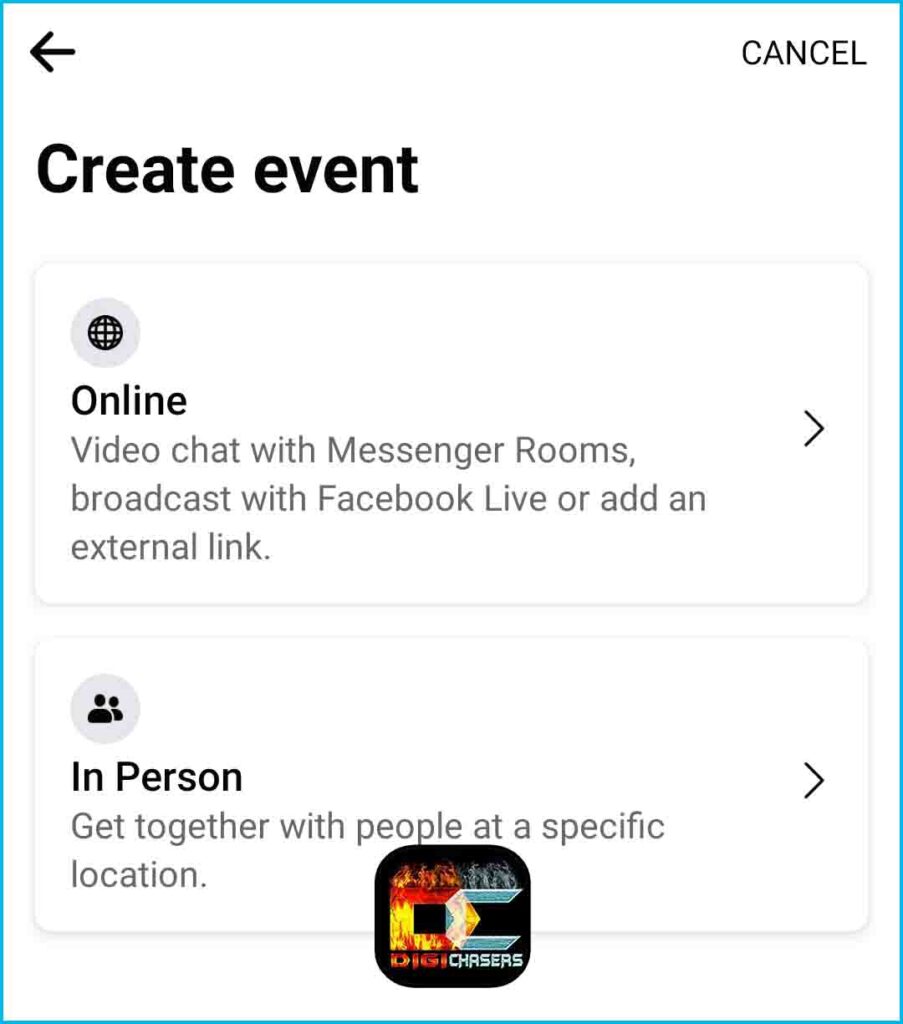
- Facebook Online Event: These are the kind of Events that are shown live. This option is used mainly by Media companies, News Organizations, Fitness instructors, Theater groups, Content creators etc.
- Facebook In Person Event: It can be a simple personal celebration or a grand concert, during which people gather in a particular place.
Next, I will continue with the Creating an In Person event tutorial.
Step 5. Event details.
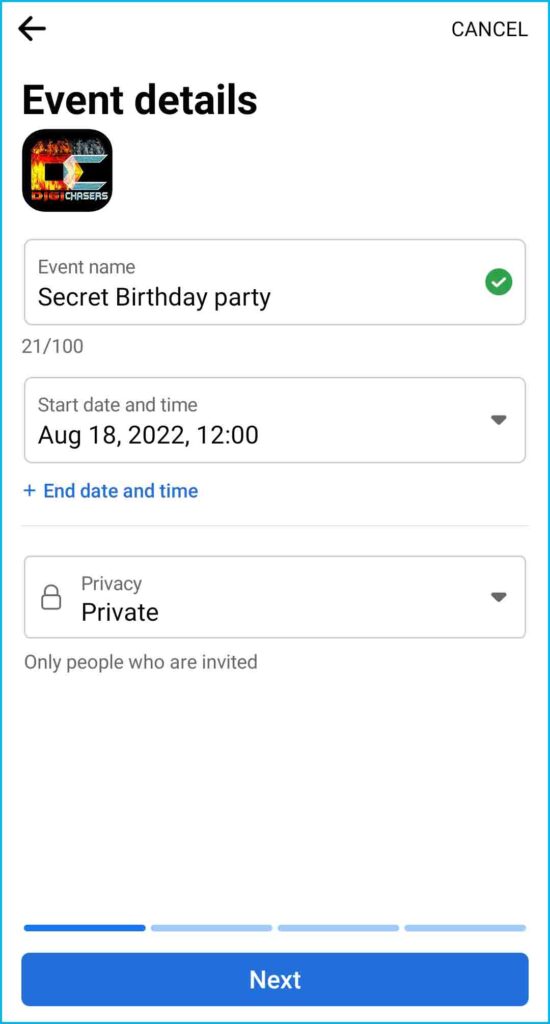
- Event name: Choose a name that reflects the event. This name will be the first thing people invited to the event will see.
- Start Date and Start time: Here, you can specify the event’s start time. If you want to add an end time, you can see the plus sign and text below “End Date and Time” and press on it.
- Privacy: Choose who can see and participate in the event. There are four main options: Private, Public, Friends, and Group.
Step 6. Location.
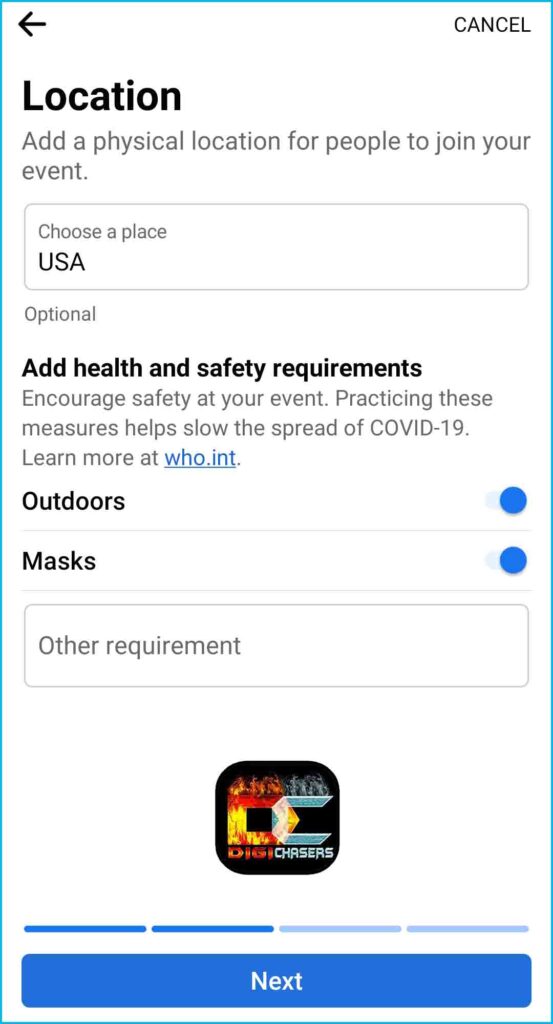
- Location: Choose the place where the event will take place.
- Outdoors: If the event will take place outdoors, check this box.
- Masks: Note whether masks will be required.
- Other Requirement: If you have other requests for participants, please check this box. You can specify more than one requirement here.
- When you have filled in these fields, click Next.
Step 7. Description.
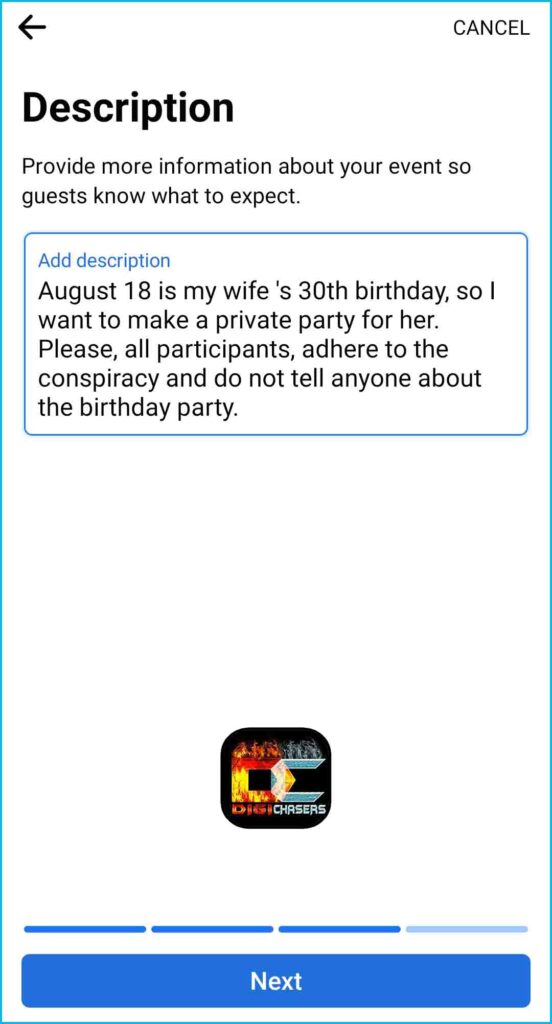
- Description: Write a clear description so that everyone understands what the event will be about. After that, press Next.
Step 8. Cover photo.
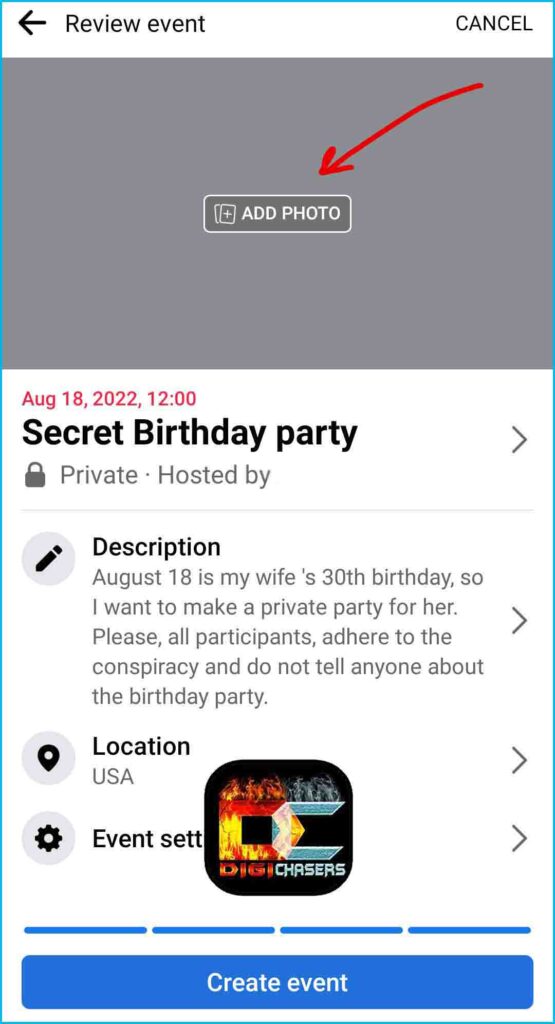
- Press ADD PHOTO to upload a cover photo for the event. You can choose a photo from your phone gallery.
Step 9. Create event.
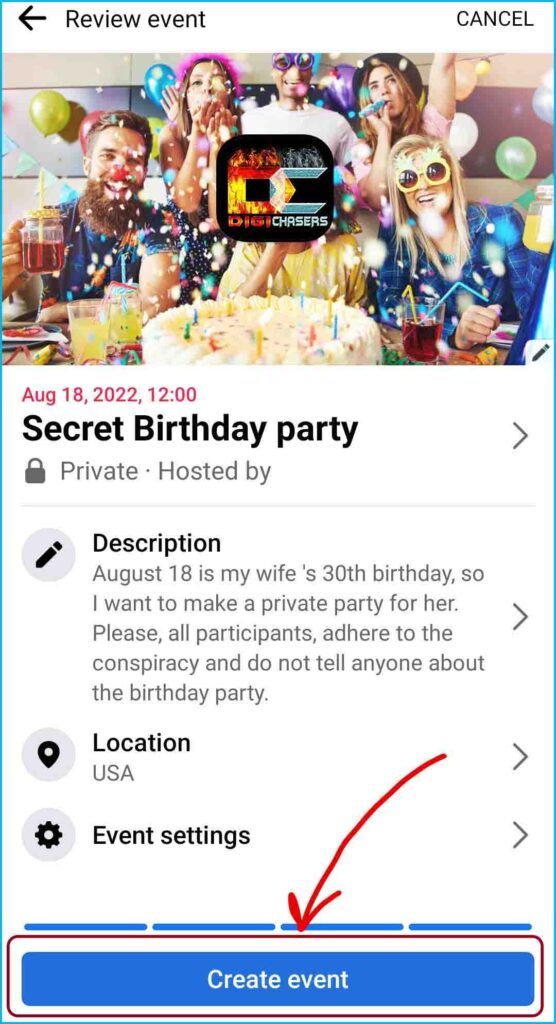
- Clicking the Create event button will create an event. After that, you will need to invite your friends to participate in the event.
Step 10. Invite Guests.
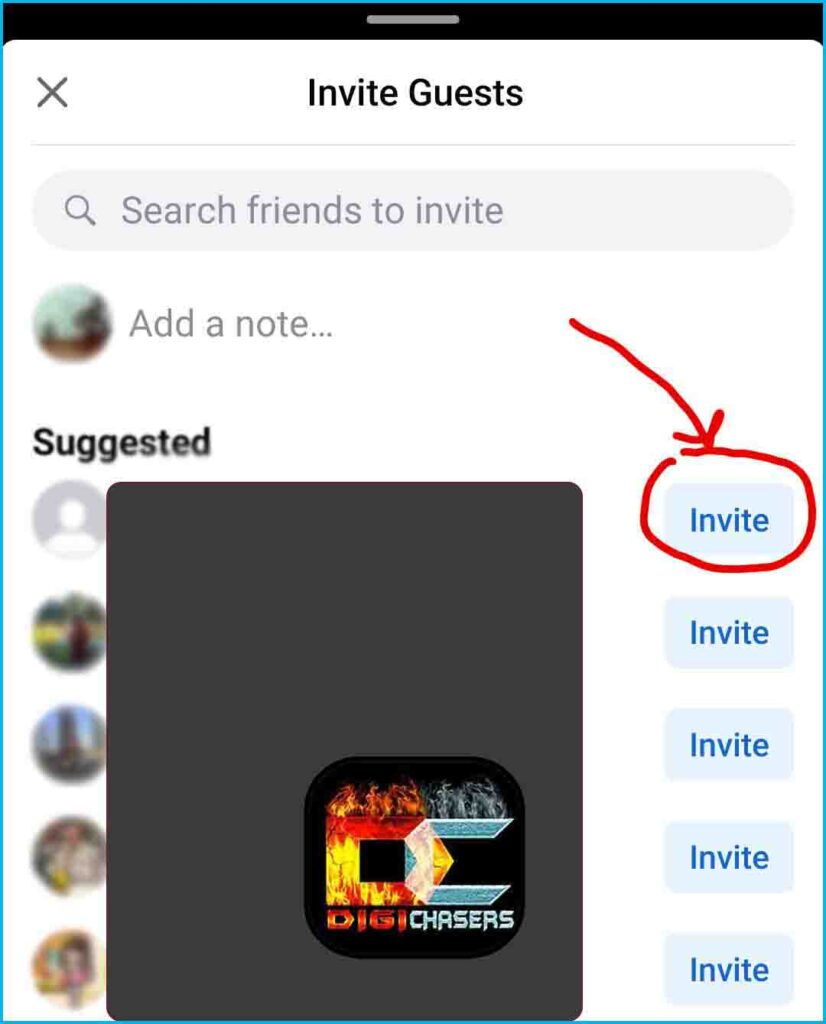
- Search for a friend in search bat or press friends from the suggested list.
Related articles:
- What is Laz+nxCarLW Facebook code?
- Facebook keeps saying I’m offline. What’s happening?
- Why does it say contact instead of message on Facebook?
- How to find Facebook Marketplace messages on Phone and PC
That’s all, and by following these instructions, you should have successfully created an event on Facebook. Have a good event.
If you have additional questions or observations, you can leave them in the comment section or write to me here.


