
Hello, today we will talk about sleeper PC cases. First of all, the word is more associated with cars when an old and regular-looking car like the Subaru Forester is upgraded by high-end engine parts and surpasses even supercars from the headlight line. The same goes for the computer world, where enthusiasts add new, powerful parts to an old computer and resurrect it for a new life.
The sleeper PC case is an old computer case with new parts. Every computer will not even know what a beast is hiding in it.
Where to find Sleeper build PC case?
First of all, I started with my own, or grandparents ’warehouse. Sometimes people like to store all sorts of things, so finding a vintage computer in a warehouse is real.
Also, before embarking on such a project, you should decide whether to use computers after 2000 or go into the world of vintage computers in the 90s.
Just before you start such a DIY project, decide if you’re ready for it because you’ll need some knowledge of computer hardware (since you’ll probably need to replace all the hardware with new ones). You’ll need a little imagination to create a good enough Airflow.
So, where to find a case for a sleeper PC?
- Check the warehouses of parents, aunts, or grandparents.
- Craigslist, or in other words, the secondhand markets.
We tried searching ebay.com and were a little disappointed as the price of vintage computers is quite high because collectors love it. When you search on ebay.com or amazon.com, use keywords such as vintage pc, old pc, retro pc. This should make your search easier.
And if you look like a PC case, pay attention to its dimensions. It must be wide enough to accommodate a full-size GPU.
How I made a sleeper PC from a Retro case
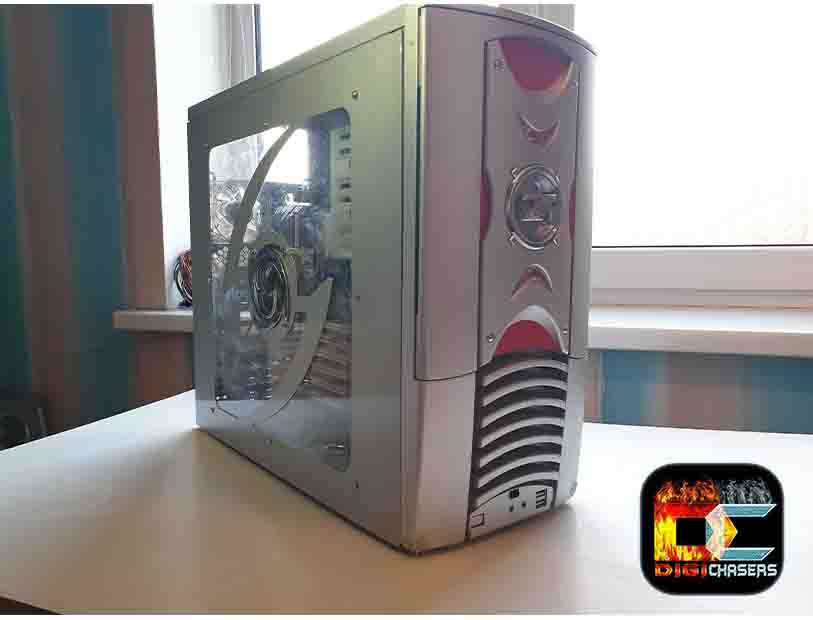
I was lucky to find an old gaming PC case stored at my uncle’s warehouse. I had told him about my plans before, so he offered me this old beast computer. Of course, this beast thing was a long time ago, and now you don’t play any newer games with it.
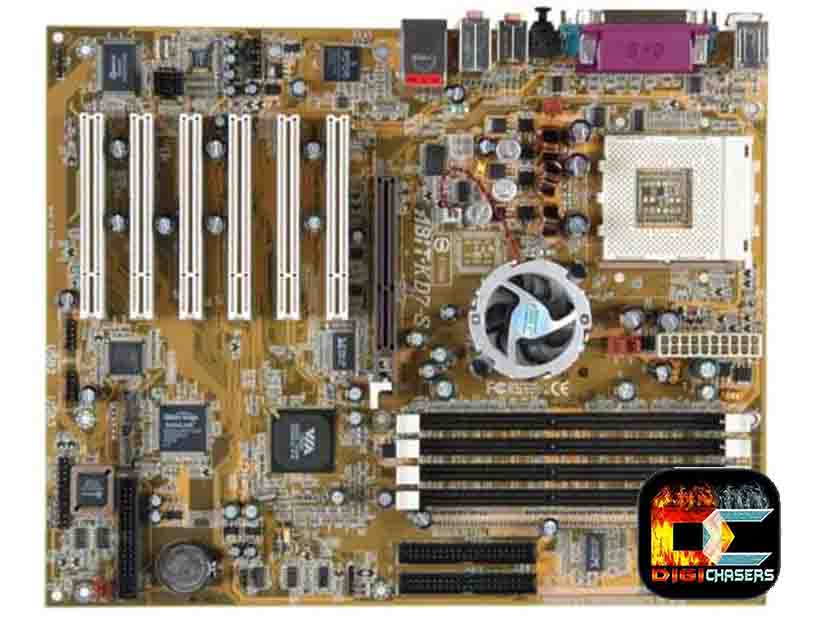
After checking the inside of the PC case, I found the Abit KD7 Motherboard inside, which in 2003 was a really good option. I found an old review article on this motherboard where they rated it as “In conclusion, I think this motherboard is incredible. I would give it 4.5 out of 5 stars.”.
So it was not an old white retro case. But I think I found an even better version of the sleeper PC case, and I decided to bring it to life again.
Removal of old parts
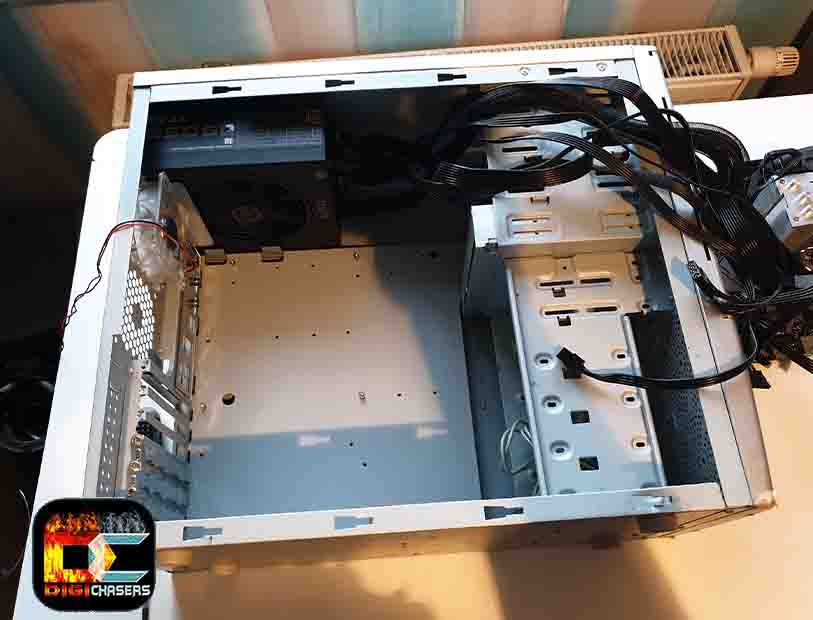
The removal of the old parts started from the PC case side take-off. After that, I disconnected an old PSU, MB. After that, I found some old PC case FANs that I might leave.
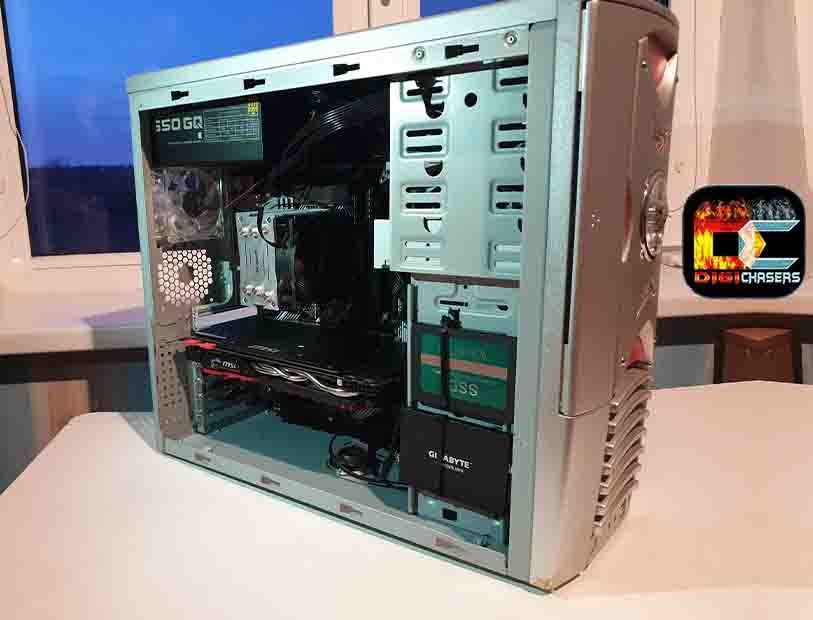
If you are doing something similar, you will need to remove the PSU (power supply unit) motherboard and probably all the other components. After cleaning, everything looked like in the photo below.
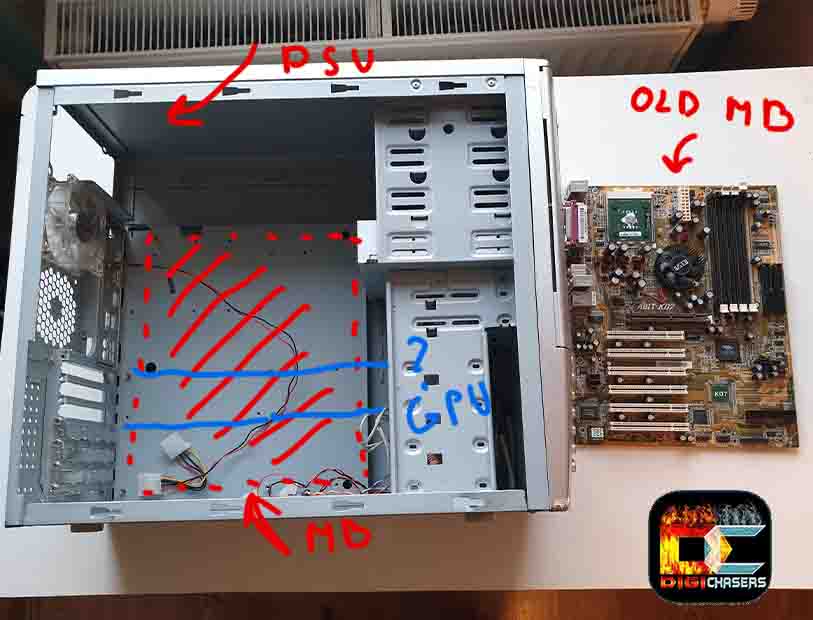
As far as upgrading old computers is concerned, the biggest question is always the GPU (Graphics Card) and PSU (power supply unit). Will, there be enough space, or will there be mounting points. As you can see from the photo, the PSU has a standard location, which I don’t think will be a problem.
Still, I decided to measure the space for the GPU because in older PC cases, it sometimes just does not fit in. And since I’m using an Nvidia GTX 1080 GPU, which isn’t the smallest video card on the market, it’s better safe than sorry.

As we can see from the photo below, there will be no problem with the GPU placement. This is because it is still a gaming pc case. If you plan to use an old vintage PC case, you may need to cut the HDD holders, etc.
New parts to be installed
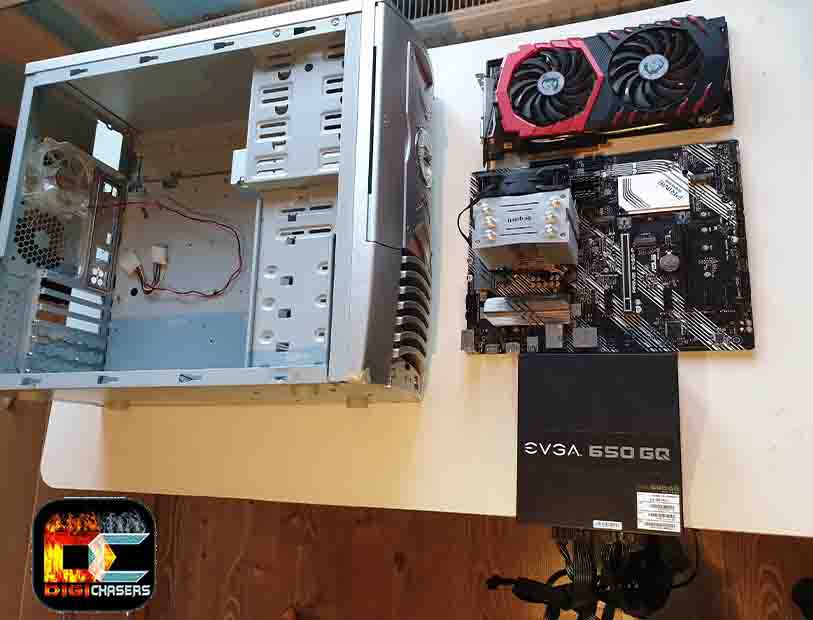
As you can see, the setup will be pretty solid. So maybe it’s not a GTX 3090 but a big upgrade enough to play new games with high-quality graphics. So, below is a list of parts used in this gaming pc sleeper case.
- Motherboard: ASUS Prime Z490-P
- CPU: i7-10700K
- CPU Cooler: be quiet! BK030 Pure Rock Slim 2
- RAM: Corsair Vengeance LPX 16GB (2x8GB) DDR4 DRAM 3200MHz
- GPU: MSI Gaming GeForce GTX 1080 8GB GDDR5X SLI
- PSU: EVGA 650 GQ
Having all these parts, start putting them in the best sleeper pc case little by little. I like to start with the PSU because I am to lazy to disconnect cables from it. And PSU wires can hang the fans on the motherboard and damage them.
I usually start with this sequence:
- Installing PSU in PC case
- Put the CPU in the motherboard, attach the CPU cooler and connect the RAM sticks.
- Installing MB to PC case
- Cable management
- Connecting HDD / SSD and other parts.
As you can see from the photo, the PSU fit just perfectly. All the mounting hinges fit. After PSU placement, I started installing MB in the beast.
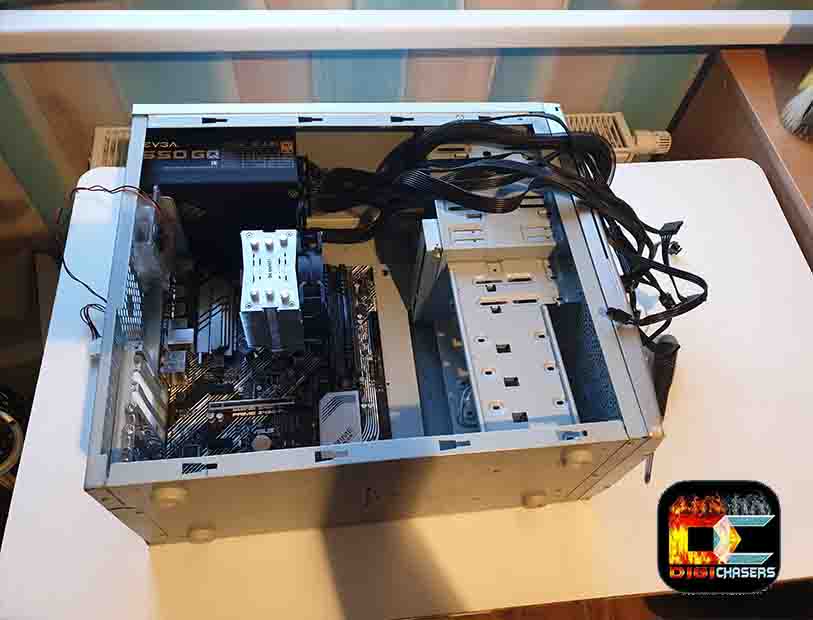
Step by step the computer becomes a real beast. The motherboard also fits into the PC case without any hassle. The queue came for the graphic card as we know it is the most expensive and valuable computer component these days. Maybe prices will return to normal, and then I’ll put something from the GTX3000 series into this beast.
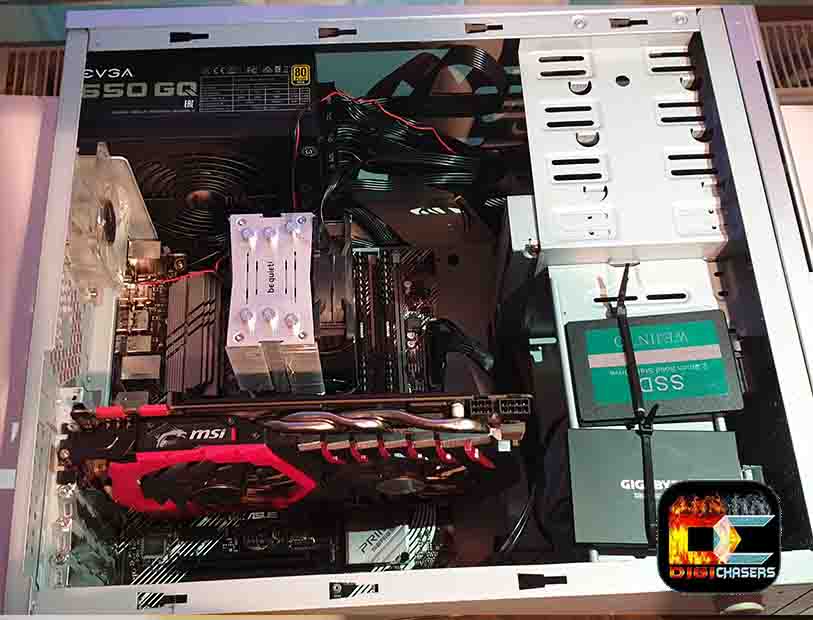
As you can see, there was also no problem with the video card. There was even some room left for the following upgrades. Also, please don’t pay attention to the SSD mount claims as they will cover up, that’s why I didn’t pay much attention to that.
It took me the most time to connect the PC case power and charge buttons to the motherboard, and it took some time to search for information about the values of the wires.
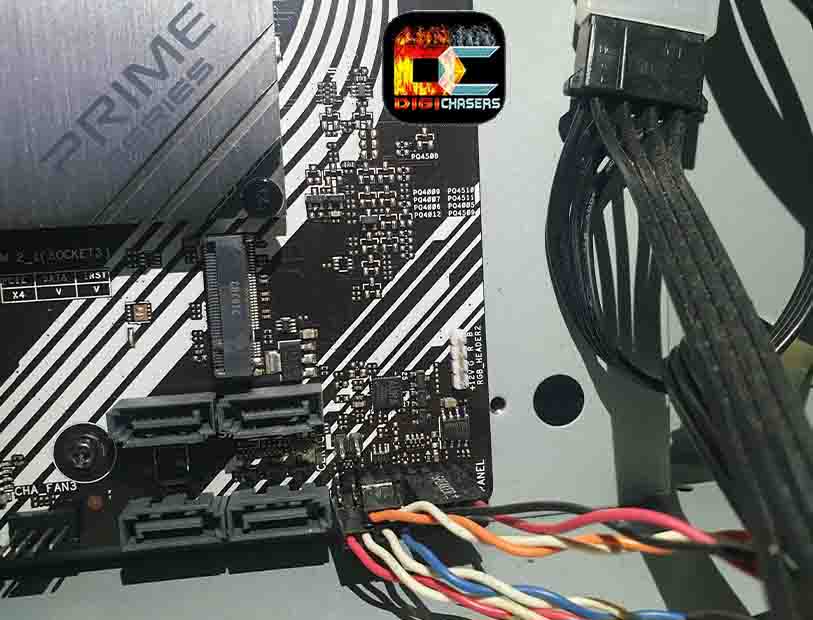
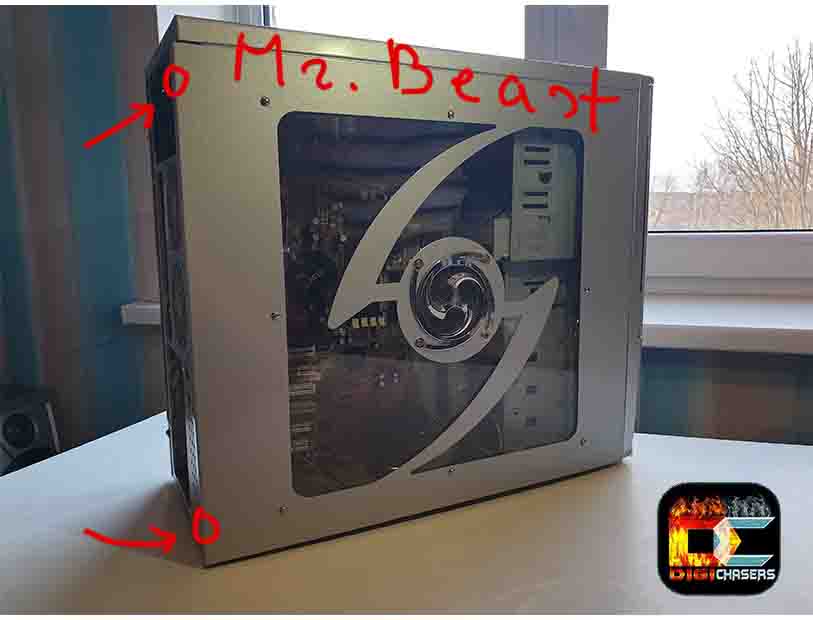
As you can see from the picture through the window, everything took a while. But, of course, I wasn’t in a hurry, with breaks all disassembly and assembly took about 2 hours.
Time to power up a beast
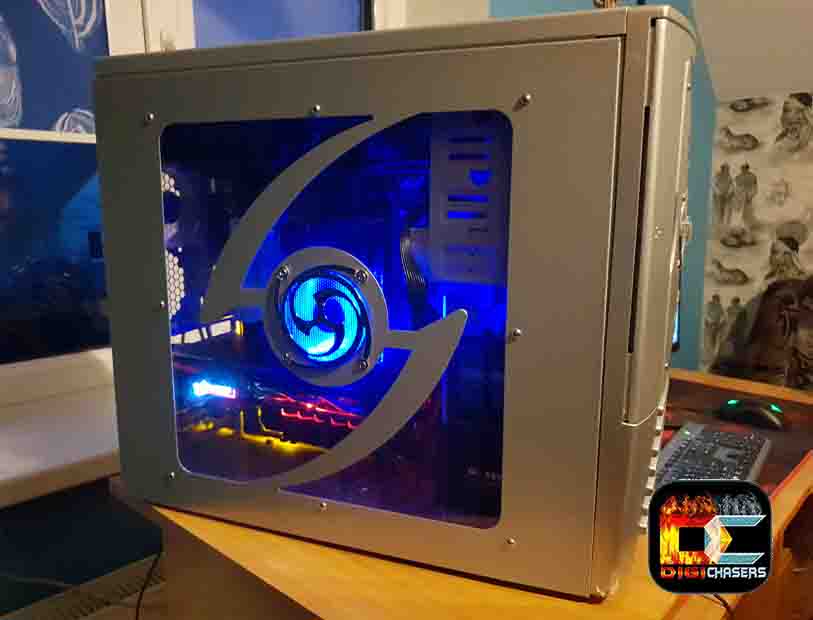
The still-working RGB fan on the PC case side board is a pleasant surprise. I plan to connect with an ARGB fan in the future if this gets boring.
Of course, my DIY project was not a completely retro computer upgrade to new parts, and I opted for an old gaming computer upgrade.
Best sleeper PC cases airflow
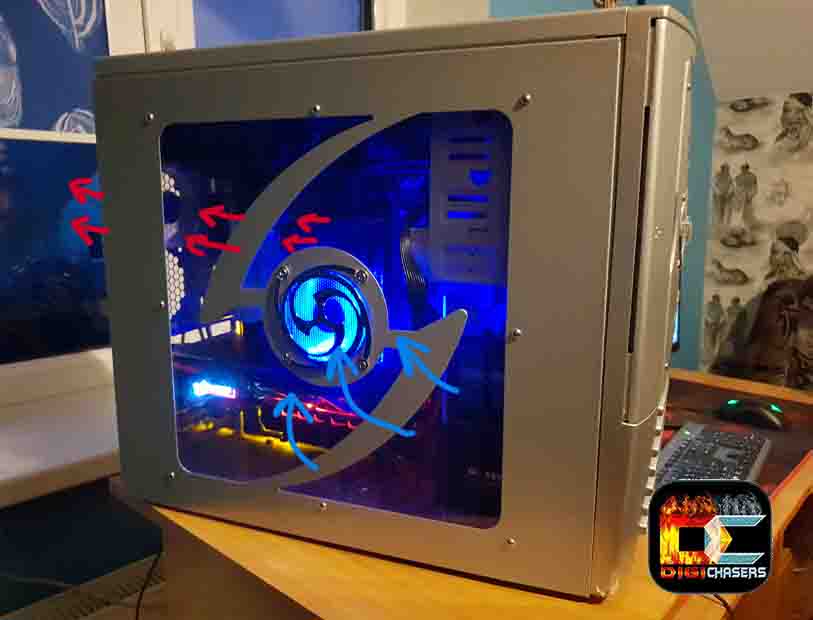
Airflow is a very important aspect in an old pc case. In my case, the computer had air intake from the side, which will definitely not be on a vintage white PC. Therefore, it will have to be done from the front or the side itself.
In the future, when I find a classic white vintage PC case, I will update this article. And if anyone wants to do a similar DIY project, you can use the steps I provided.
Related article
- ARGB vs RGB. Beginner’s guide (2022).
- What is PCIE power cable? Explained.
- DDR3 to DDR4 adapter. Is it possible?
- What is a Power Supply Shroud? Quick answer.
I hope you are happy with my result as well. If you have suggestions, you can leave them in the comments section.

Hey man,
Do you have any idea what the name is of the PC case?
Hello Omar, you are talking about one that I made a tutorial on?